


 Making Springs on the Small Lathe
This article deals with making small springs using a metal lathe. There may be other, better ways of doing it. This is how I've done things in my own home shop for years, and these methods have worked well for me.
You will find two parts to this write up. This one, and a second part linked to
at the bottom of this page. This first part deals with small extension springs.
NOTICE!
Safety glasses are a must in any machine shop, at all times. This is never more true
than when working with spring wire. Wear safety glasses!
Now, on to the fun stuff.
I make my daily bread working on old cameras. Stuff that was made before anyone ever thought of taking film out of cameras and replacing it with a computer. Most of my work involves purely mechanical cameras, made even before cameras needed batteries, much less chips and memory cards.
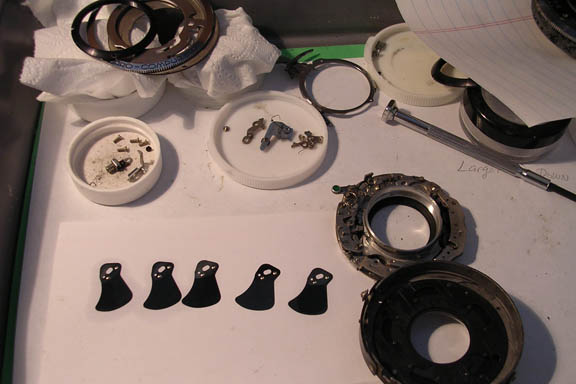
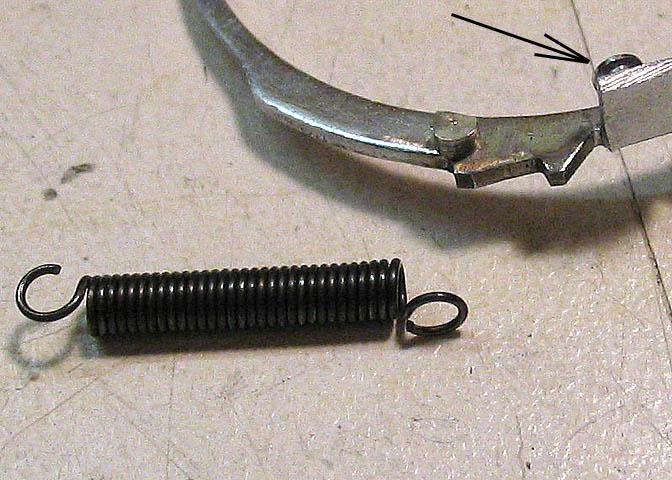
One of my typical jobs is repairing shutters, which involves taking them to pieces, like the one in the picture above.
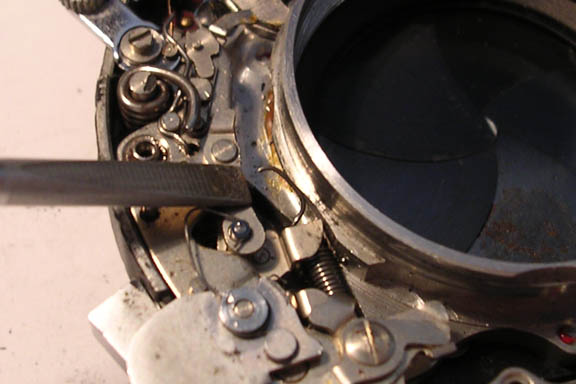 This particular unit is a German made Synchro Compur, and this type was last made about 45 years ago.
The screwdriver is pointing to the end of the broken mainspring. I'll bet lots of repair shops, of any type, rely on a fair percentage of problems caused by someone just not listening to their bit of machinery, whether it's a camera or a car, or whatever. Something else was originally wrong with this shutter that wouldn't let the last operator cock it, so they forced it.
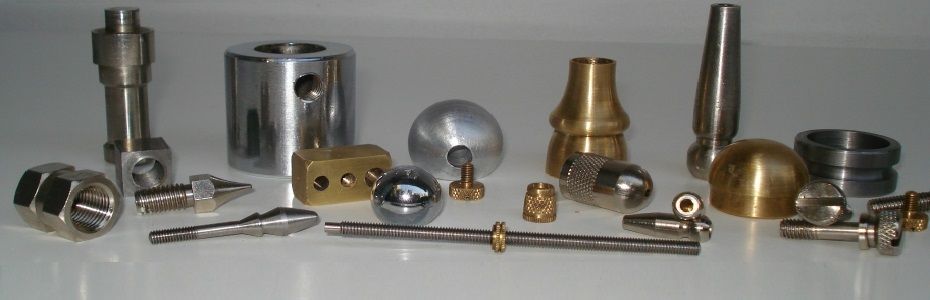
So, on to what this is really about. A quick demo on making small springs.
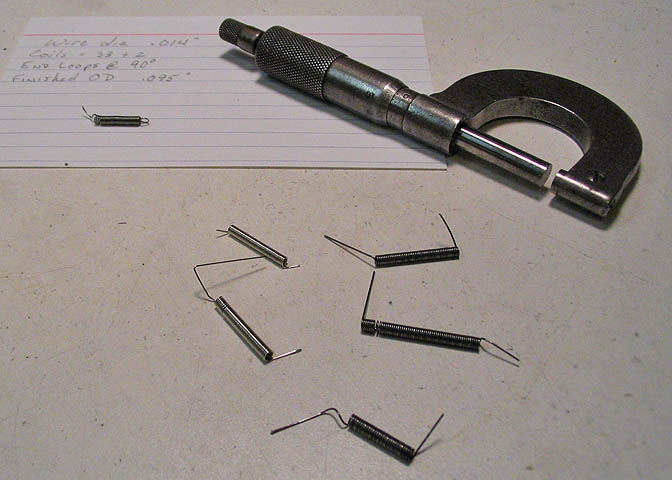
With the spring out of the shutter, it can be measured for a number of need-to-know things. Mainly, the wire diameter, the coil diameter, how many coils, and whatever other notes may be useful, like the direction of any hooks or eyes/loops needed on the ends of the spring.
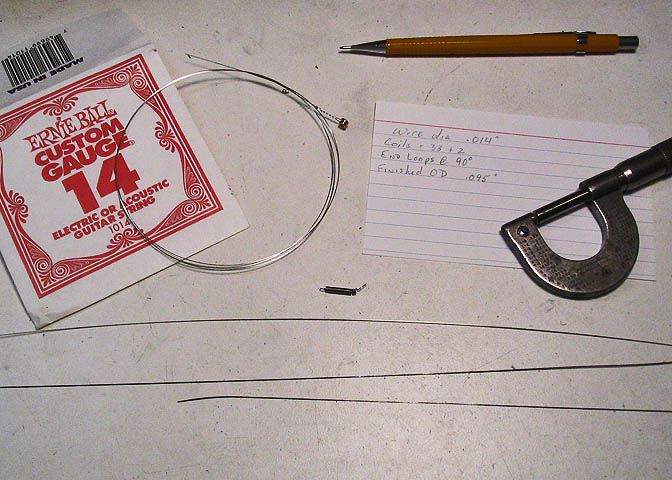
The original spring is shown in the center of the picture, above. The wire size on this spring is .014" diameter. There are a couple of sources of wire suitable for this type of spring, shown here. One is guitar strings, which are really just tarted up music wire. The other is regular music wire that is sold as just that, or some times called spring wire. It's all music wire, as far as I know.
Guitar strings are really easy to get in almost any town. They're very good for small springs of almost any type, but they only come in a limited size range. If you want a quick assortment of small spring wire, go buy every different sized solid steel guitar strings you can find, and you'll have a good start.
Wire that is sold as music wire is basically the same stuff, but it doesn't usually come polished like guitar strings.
(You don't need polished wire, unless that's what you want for appearances.) Regular music wire is usually black, and you can get it at hobby stores that sell supplies for RC airplanes and the like.

The two wire sizes I had on hand were both slightly different sizes than the original spring.
One was almost .015", one about .0135". I'll make a few spring blanks in both sizes. I always
make extras for a particular job, in case "someone" goofs.
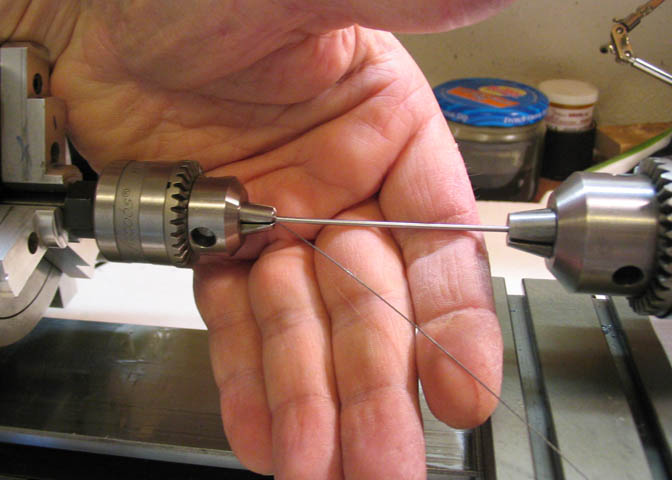
This is the basic setup I use for making SMALL springs. This way only works well with small wire sizes, up to about .025". Larger wire sizes absolutely must be done using a winding jig, for your own safety.
The first consideration here is the size of the arbor that will be used to form the spring coil diameter. I do it the simplest way I know how, which is to check the inside of the broken spring using different sizes of wire.
When I find the wire that fits, I use that size to judge what I think will work. The spring wire usually has to be wound smaller than the size spring you actually need, because as soon as it's done being wound, it springs open a little bit.
For an example of what I mean, the nearest sized wire I had that fit close inside the broken spring was .062" dia.
If I wind the new spring on that size arbor, the new spring might be too big in dia. So, I used the next size smaller wire I had as an arbor, which was .055" dia. I did make a couple using an .062" arbor too, because of a peculiar thing that happens to the wire that will be noted a little farther down in this post.
In the picture above, the winding arbor has been mounted in the chuck on the left, with one of the chuck jaws pinching on the spring wire. The chuck on the right is not tight on the wire. Just closed down enough to keep the arbor from bending when the spring is wound, but still loose enough that the arbor can spin freely.
Some safety things that have to be said;
Safety glasses! Tiny wire will go right into your eyeball, just like a needle.
Gloves are okay as long as you are not using the power on your lathe.
Start with a piece of wire that will be enough to make your spring, of course, but don't have wire hanging out and drooping down to the floor, (unless you need that long of a spring). Keep it short as is practical.
Don't let go of the wire when winding until you have let it relax. The small wire size being used here won't break anything if you should turn it loose, but it's not good practice, and if you were to do it with larger wire, it will scare you at the best, scar you at the worst.
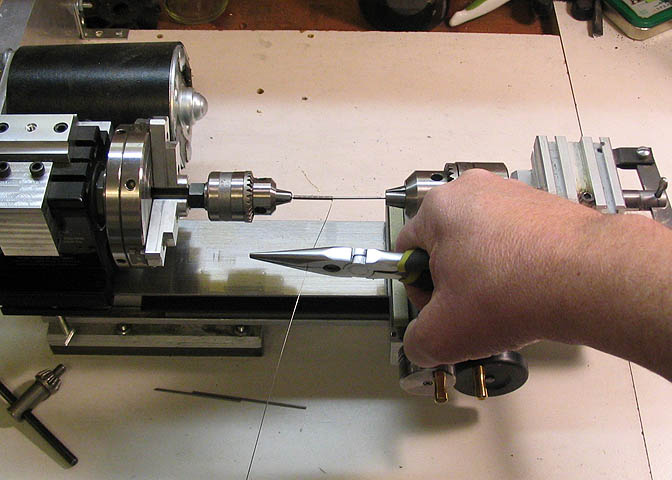
The piece of wire is now gripped tightly with pliers, and the headstock pulley on the lathe is turned by hand to form the coils. Unplug the lathe, turn it by hand, when using this method.
As soon as a coil or two are formed, the wire is moved to the left, as shown in the picture above.
This keeps the coils tight against each other. At the same time this is being done, pressure is kept on the wire, pulling it back toward the operator. You have to pull pretty hard, and keep an eye on the coils to make sure they are staying tight against each other.
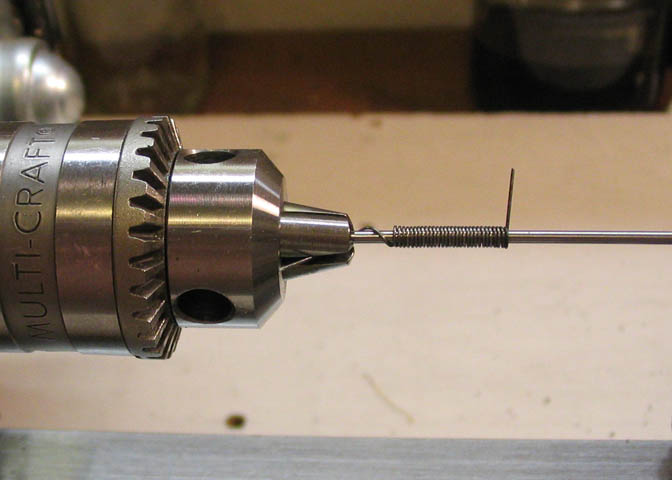
When the coils are long enough to make the length of spring you need, give it a few more turns, then, slowly turn the arbor backward until all the tension on the new spring is released. It will relax a little and open up slightly. You must not just let go of the wire when the spring is as long as you need it.
If you do, the wire will be pulled back toward the chuck, and make a rats nest, not to mention
flailing around a bit when it does so.I want to mention again here, you can only make springs that use small diameter wire with this method.
And again, .025" wire is about the max. Anything larger than that needs a winding fixture. Serious!
When the spring is long enough for your needs, let it relax slowly, and cut off the tail. Then
you can take it out of the lathe and off the arbor.
I made five blanks for this job. Ideally, I'll only need one, but since the next step takes a while, and I
don't want to repeat it if I should mess up when bending the eyes, I make extras.
I've been making springs like this for ten years or so, and have learned it's easier just to make a few more than you need than to start the whole process over.
You can see a couple there that have a loose coil. That's the reason those two are longer than the rest.
I just made them a little longer when I saw the bad coil, and I can cut the bad part off later and still have a usable spring.
This next bit, including the following few pictures show the method I use to heat the springs.
They have to be stress relieved after the winding process, or they won't hold their shape well.
If you don't do this step, the springs won't be as springy as they should be, and can easily
be stretched out of shape.
I make a nest for them using steel wool and foil. Put the springs on one half of the steel wool.
Fold the steel wool over to make a sandwich.
Fold the foil lightly around the wool to make a loose packet.
Pop it in the oven. This little toaster oven does a good job on music wire. I put it on its highest
setting, which is 450f, and leave them for an hour, then turn off the oven and let it cool naturally.
It takes about an hour and a half, and that's why I make extra springs. The five springs took me
about 10 minutes to make, but 1 1/2 hours to cook and cool. If I only made one spring, and messed it up after cooking, I'd have to start all over again.
There is another way to do the heating thing. You can use a small can, like a tuna can, fill it half full of brass shavings, put the springs in, and fill it the rest of the way with shavings. It does the same thing. I find the steel wool way more convenient.
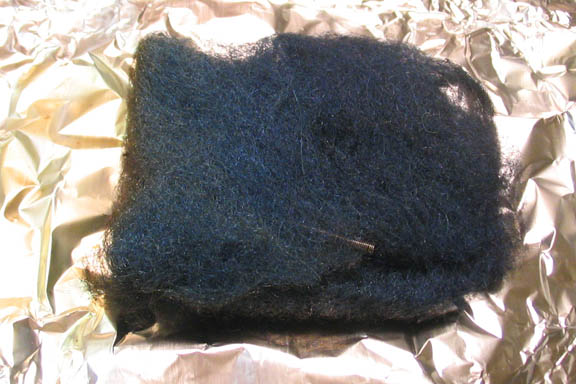
This is what you want to see when you open the packet. The steel wool should be somewhat blue from the heat treatment. The springs that were shiny to begin with will be slightly off color. The springs that were black will still be black.
Here's where the peculiar thing I mentioned earlier comes into play when sizing the arbor for winding the spring. When you heat this stuff to stress relieve it, it gets a little smaller. The diameter changes just a touch. So, if you need a spring that has to be an exact diameter across the coils, you'll have to experiment a little with the arbors you use to wind them. If someone had asked me before I had ever done this, I would have thought they would get larger. But, they shrink.
Something you married folks should probably know before you do this step in the house. Steel wool has a tiny trace of oil on it, to keep it from turning to a ball of rust between the time you buy it and the time you get around to using it. That little bit of oil does make a slight odor when you cook it.
My dog doesn't care about that odor, or, if she does, she doesn't mention it.
A spouse may not feel the same way.
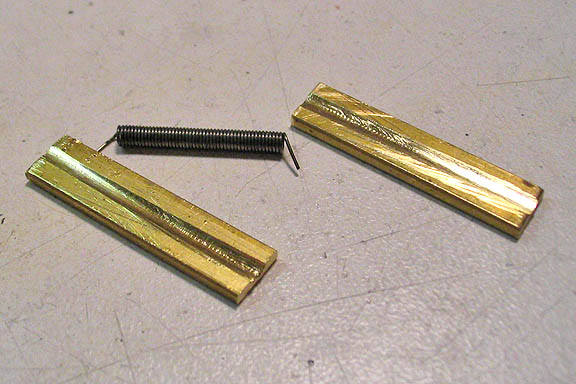
Here's one of the heat treated springs, ready for the final sizing and pulling out the eyes.
The two brass pieces are for holding the spring. They each have a small round bottomed
channel filed in them so they won't rock around on the spring once it is positioned
between them. I've made a lot of this size spring over the years. You can see some
grooves that look similar to threads have started to wear into the slots where
spring coils bear against them.
The little tail on one end of the spring is clipped off with flat nosed wire cutters, and
it's then positioned between the blocks.
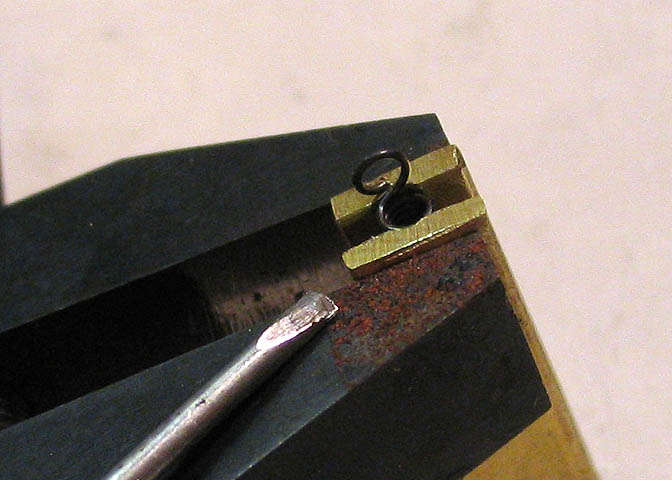
The first eye is pulled up. The spring has to be put between the blocks just so, in order for the
end of the coil to end up in the correct place. You'll have to figure that out for what
ever spring type you're making.
Then, using a small rod filed to the shape of a screwdriver end, it's wedged between the end coils, and levered up to bring up the eye. The clamp has to be pretty tight on the spring to do this, in order to keep the second coil in line from pulling up with the first one. Once it is pried up a little, I put a rod down the center of the spring, and pry against it a little to get the eye pointing straight out.
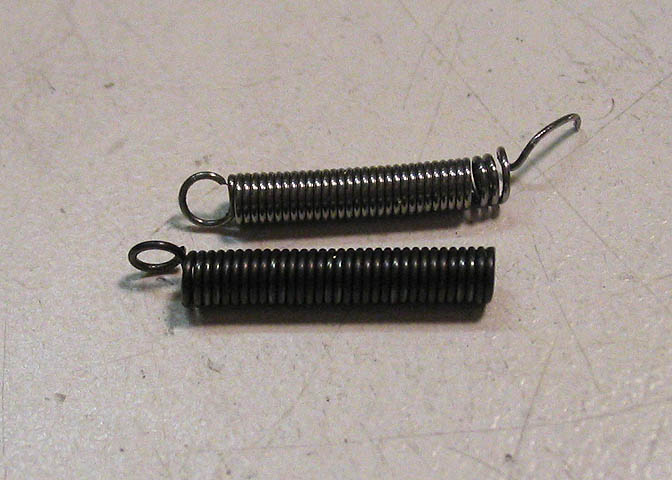
Here's the new spring, and the old one. In this shot, I'm just getting a sense of the position for the second eye needed on the other end. The the eye pulling process is repeated.
The new spring looks somewhat fatter in this picture. It's a trick of the camera, though. The new one is within .001" dia. of the old one.
Well, that's it. The new spring is done, and by now, it's in the old shutter, ticking away.
Article resource http://www.deansphotographica.com/


